contents
Angular vs React
Published on 2025-04-17

1. Installation
React:
-
Create a Project
npx create-react-app <Your project name>
i.e npx create-react-app my-app
-
Go to the project directory
cd <Your project name>
i.e cd my-app
-
Run a project command:
npm start
-
The development server is running on port 3000 at
http://localhost:3000
-
Build command
npm run build
Angular:
-
Install Angular cli tool globally
npm install -g @angular/cli
-
Create a project
ng new <Your project name> --routing=true --standalone=false --style=scss
i.e ng new my-angular-app --routing=true --standalone=false --style=scss
-
standalone=false is the module file created default.
-
Run the above command following question show enter select N and enter

-
Go to the project directory
cd <Your project name>
i.e cd my-angular-app
-
Open your terminal run a project command use bash or command prompt
ng serve
-
The development server is running on port 4200 at
http://localhost:4200
Create a Component:
React:
-
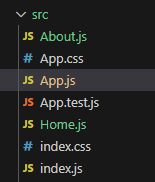
You can manually create a component in a new file, for example, Home.js, in your React project's src folder.
-
file name always starts with a Capital letter
-
View HTML template
Home.js
import React from 'react';
import './App.css'

const Home = () => {
  return (
    <div className='title' >
      <h1>Welcome to my React app</h1>
    </div>
  );
};

export default Home;
App.css
.title{
  color: red;
  display: flex;
  align-items: center;
  justify-content: center;
  width: 100%;
  height: screen;
   background-color: aliceblue;
}
App.js
import React from 'react';
import Home from './Home';

const App = () => {
  return (
    <>
    <Home></Home>
    </>
  );
};

export default App;
Output:

Angular:
-
Open your terminal run a cmd use bash or command prompt
ng generate component <Your component name>
i.e ng generate component home
-
The component will be created below your project src folder and by default create CSS and HTML file
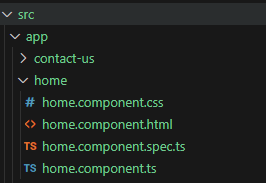
-
file name always starts with a Small letter
-
View HTML template
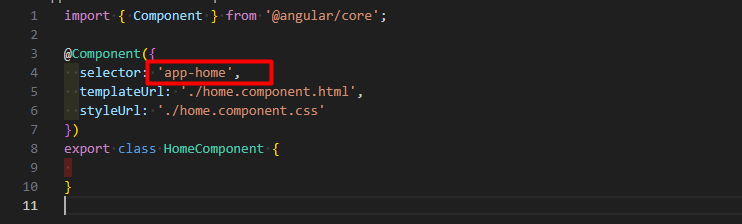
Which HTML component view that ts file selector copy and paste app.component.ts
(i.e) Home component HTML template view home.component.ts file copy selector value and paste app.component.ts file
home.component.html
<div class="title">
  <h1 >welcome to my angular app</h1>
</div>
home.component.css
  .title{
    color: red;
    display: flex;
    align-items: center;
    justify-content: center;
    width: 100%;
    height: screen;
    background-color: aliceblue;
  }
home.component.ts
app.component.ts
<app-home></app-home>Output:

Data Binding:
In React, updating values is handled through state management (e.g., using useState hooks). In Angular, a similar concept is achieved through data binding, where values are automatically synchronized between the component class and the view using techniques like property binding, event binding, and two-way binding.
Angular supports four types of data binding:
-
Interpolation ({{}}): Binding data from the component class to the view.
-
Property Binding ([property]): Binding a DOM property to a component property.
-
Event Binding ((event)): Binding an event in the view to a method in the component.
-
Two-way Binding ([(ngModel)]): Synchronizing data between the component and the view.
1. Interpolation
Interpolation is a form of data binding that allows you to embed component data inside the HTML template by wrapping the data in curly braces {{}}. It’s typically used to bind component properties to the view in a read-only manner.
home.component.ts
import { Component } from '@angular/core';

@Component({
  selector: 'app-home',
  templateUrl: './home.component.html',
  styleUrl: './home.component.css'
})
export class HomeComponent {
  message: string = 'Welcome to Angular Application'

}
home.component.html
export default function Home(){
return(
<>
<main>
<h1>{{message}}</h1>
</main>
</>)
}
In this example, the component properties message are embedded in the HTML template using interpolation. Angular automatically updates the view whenever the values of message change.
2. Property Binding:
Property Binding allows you to bind an element's property (such as src, href, disabled, etc.) to a component property. You use square brackets [] to bind a component property to an element property.
import { Component } from '@angular/core';

@Component({
  selector: 'app-home',
  templateUrl: './home.component.html',
  styleUrl: './home.component.css'
})
export class HomeComponent {
 imageUrl = 'https://angular.io/assets/images/logos/angular/angular.svg';
  isButtonDisabled = true;

}
home.component.html
export default function Home(){
return(
<>
<main>
<img [src]="imageUrl" alt="Angular logo">
<button [disabled]="isButtonDisabled">Click Me</button>

</main>
</>)
}
-
The src property of the <img> tag is bound to the imageUrl component property.
-
The disabled property of the <button> tag is bound to the isButtonDisabled component property.
When the imageUrl or isButtonDisabled values change, the view will automatically reflect the updates.
3. Event Binding
Event Binding allows you to bind user events (such as click, change, keyup, etc.) to component methods. You use parentheses () to bind an event to a method in the component.
home.component.ts
import { Component } from '@angular/core';

@Component({
  selector: 'app-home',
  templateUrl: './home.component.html',
  styleUrl: './home.component.css'
})
export class HomeComponent {
onClick() {
    alert('Button was clicked!');
  }

}
home.component.html
export default function Home(){
return(
<>
<main>
 <button (click)="onClick()">Click Me</button>
</main>
</>)
}-
The click event on the <button> element is bound to the onClick() method in the component.
-
When the user clicks the button, the onClick() method is triggered, and an alert is shown.
4.Two-Way Data Binding
Two-way Data Binding allows synchronization between the component's data and the view. Any changes in the view will be reflected in the component's property, and any changes in the component's property will be reflected in the view. Angular provides the [(ngModel)] directive to implement two-way data binding.
home.component.ts
import { Component } from '@angular/core';

@Component({
  selector: 'app-home',
  templateUrl: './home.component.html',
  styleUrl: './home.component.css'
})
export class HomeComponent {
userInput = '';

}
home.component.html
export default function Home(){
return(
<>
<main>
 <input [(ngModel)]="userInput" placeholder="Enter text">
    <p>You typed: {{ userInput }}</p>
</main>
</>)
}
Explain:
-
The [(ngModel)] directive binds the userInput property to the value of the input field.
-
When the user types in the input field, the userInput property is updated.
-
The updated value of userInput is displayed below the input field using interpolation.
Create a Router:
React:
-
First, you need to install the React Router package:
npm install react-router-dom@latest
-
Open src/App.js and set up routes:
import React from 'react';
import { BrowserRouter as Router, Route, Routes, Link } from 'react-router-dom';
import Home from './Home';
import About from './About';

const App = () => {
  return (
    <Router>
      <nav>
        <Link to="/">Home</Link> | <Link to="/about">About</Link>
      </nav>

      <Routes>
        <Route path="/" element={<Home />} />
        <Route path="/about" element={<About />} />
      </Routes>
    </Router>
  );
};

export default App;
Explain:
-
Creating Components: Each page is represented by a separate React component (Home, About).
-
Routing: The <Routes> and <Route> components from React Router map paths (e.g., / or /about) to corresponding components.
-
Navigation: The <Link> component provides easy navigation without refreshing the page.
Angular:
app-routing.module.ts
import { NgModule } from '@angular/core';
import { RouterModule, Routes } from '@angular/router';
import { HomeComponent } from './home/home.component';
import { AboutComponent } from './about/about.component';

const routes: Routes = [
  { path: '', component: HomeComponent },
  { path: 'about', component: AboutComponent },
];

@NgModule({
  imports: [RouterModule.forRoot(routes)],
  exports: [RouterModule]
})
export class AppRoutingModule { }
app. component.html
<nav>
  <a routerLink="/">home</a>
  <a routerLink="/about">About</a>
</nav>
<router-outlet></router-outlet>
Explain:
-
<router-outlet>: Angular uses this directive to render the matched component.
-
routerLink: The directive used to link to different routes.
Call Function with Events:
React:
react is call Handling Events.
-
onClick:
export default function Home(){
const handleOnClick=()=>{
console.log("click event call")
}
return(
<>
<main>
<p onClick={()=> handleOnClick() >Click me </p>
</main>
</>)
}-
onChange:
export default function Home(){
const handleOnChange=()=>{
console.log("onchange event call")
}
return(
<>
<main>
<p onChange={()=> handleOnChange() >Click me </p>
</main>
</>)
}
Angular:
In angular is call events bindings
-
Onclick
home.component.html
<div  style="display: flex; flex-direction: column; align-items: center; justify-content: center; background-color: aqua; color: red; width: 100%; height: screen;">
  <h1 >welcome to my angular app</h1>
  <p (click)="handleClick()" style="cursor: pointer;">Click Me</p>
  <p  style="color: green;"  >{{showMsg}}</p>
</div>
home.component.ts
import { Component } from '@angular/core';

@Component({
  selector: 'app-home',
  templateUrl: './home.component.html',
  styleUrl: './home.component.css'
})
export class HomeComponent {
  showMsg: string = ''

  handleClick() {
    this.showMsg = "Onclick event called!"
  }
}
-
Onchange:
<p (change)= "handleChange()"></p>Conditionals:
if statements:
React:
if user login is successful set local storage localStorage.setItem("getUserLoginInfo", true)
if user is logout set false
import React from 'react';

const Homne= () => {

const isLoggedIn= localStorage.getItem("getUserLoginInfo")

  return (
    <>
    <button>{isLoggedIn ? 'Login' : 'Signup'}</button>
    </>
  );
};

export default Home;
Angular:
In Angular call Structural DirectiveIn Angular, the && operator is typically used within interpolation ({{}}) or structural directives like *ngIf. It behaves the same way as in plain JavaScript.
home.component.html
<div  style="display: flex; flex-direction: column; align-items: center; justify-content: center; background-color: aqua; color: red; width: 100%; height: screen;">
  <h1 >welcome to my angular app</h1>
  <button *ngIf="isLoggedIn == true">Login</button>
 <button *ngIf="isLoggedIn == false">Sign up</button>
</div>
home.component.ts
initially set false. when user is successfully login set true
isLoggedIn:boolean = falseReact:
Ternary Operators:
Inline conditionals using the ? operator.
Home.js
import React from 'react';
import React, { useEffect, useState } from 'react';
const Home= () => {
  const [isLoggedIn, setIsLoggedIn] = useState(false);

  useEffect(() => {
    const storedLoginStatus = localStorage.getItem("getUserLoginInfo");
    if (storedLoginStatus === 'true') {
      setIsLoggedIn(true);
    }
  }, []);
  return (
    <>
     Button>{isLoggedIn ? 'Login' : 'Signup'}</button>
    </>
  );
};

export default Home;
Angular:
home.component.html
<div  style="display: flex; flex-direction: column; align-items: center; justify-content: center; background-color: aqua; color: red; width: 100%; height: screen;">
  <h1 >welcome to my angular app</h1>

 <button>{{ isLoggedIn ? 'Login' : 'Signup' }}</button>
</div>
home.component.ts
initially set false. when user is successfully login set true
isLoggedIn:boolean = falseLogical AND (&&)
-
The Logical AND (&&) operator is used to conditionally render content when the first condition is true. It short-circuits, meaning if the left-hand condition is false, the right-hand expression will not be evaluated.
React:
In React, the && operator is commonly used in JSX for conditional rendering. It works by rendering the right-hand side expression only if the left-hand condition evaluates to true.
import React from 'react';
import React, { useEffect, useState } from 'react';
const Home= () => {
  const [isLoggedIn, setIsLoggedIn] = useState(false);

  useEffect(() => {
    const storedLoginStatus = localStorage.getItem("getUserLoginInfo");
    if (storedLoginStatus === 'true') {
      setIsLoggedIn(true);
    }
  }, []);
  return (
    <>
      {isLoggedIn && <h1>Welcome, User</h1>}
    </>
  );
};

export default Home;-
If isLoggedIn is true, <h1>Welcome, User!</h1> is rendered.
-
If isLoggedIn is false, nothing is rendered.
Angular:
In Angular, the && operator is typically used within interpolation ({{}}) . It behaves the same way as in plain JavaScript.
Interpolation:
home.component.html
<div>
  {{ isLoggedIn && 'Welcome, User!' }}
</div>
home.component.ts
initially set false. when user is successfully login set true
isLoggedIn:boolean = falseswitch statements:
The switch statement is used in programming to execute different code blocks based on a specific value. In React and Angular, switch can be implemented in various ways to control rendering or logic.
React:
React does not have a built-in switch for conditional rendering in JSX, but you can use JavaScript's native switch statement inside a function to manage different cases.
import React from 'react';

const Home= () => {
  const getStatusMessage = (status) => {
    switch (status) {
      case 'loading':
        return 'Loading...';
      case 'success':
        return 'Data fetched successfully!';
      case 'error':
        return 'An error occurred.';
      default:
        return 'Unknown status.';
    }
  };

  const status = 'success';

  return (
    <div>
      <h1>{getStatusMessage(status)}</h1>
    </div>
  );
};

export default Home;
Angular:
Angular provides a built-in structural directive called ngSwitch for handling switch cases in templates. It simplifies conditional rendering without requiring custom functions.
home.component.html
<div [ngSwitch]="userRole">
  <p *ngSwitchCase="'admin'">Admin Panel</p>
  <p *ngSwitchCase="'user'">User Dashboard</p>
  <p *ngSwitchDefault>Guest View</p>
</div>
home.component.ts
status: string = 'success';
For loop statements:
React:
-
If you want to use a for loop explicitly, handle it outside the JSX:
import React from 'react';

const Home= () => {
  const items = ['Apple', 'Banana', 'Cherry'];
  const renderItems = () => {
    const list = [];
    for (let i = 0; i < items.length; i++) {
      list.push(<li key={i}>{items[i]}</li>);
    }
    return list;
  };

  return <ul>{renderItems()}</ul>;
};

export default Home;
-
React uses JavaScript loops for iteration, but typically, developers use the .map() method for rendering lists in JSX because JSX doesn't support native for loops directly.
import React from 'react';

const Home= () => {
  const items = ['Apple', 'Banana', 'Cherry'];

  return (
    <ul>
      {items.map((item, index) => (
        <li key={index}>{item}</li>
      ))}
    </ul>
  );
};

export default Home;
Angular:
Angular uses structural directives, specifically *ngFor, for iteration in templates. It provides a clean and declarative way to iterate over arrays or objects.
home.component.html
<ul>
  <li *ngFor="let item of items; index as i">
    {{ i + 1 }}. {{ item }}
  </li>
</ul>
home.component.ts
items = ['Apple', 'Banana', 'Cherry'];
-
Iterating Over an Array of Objects
home.component.html
<ul>
  <li *ngFor="let item of items">
    {{ item.id }}. {{ item.name }}
  </li>
</ul>
home.component.ts
items = [
  { id: 1, name: 'Apple' },
  { id: 2, name: 'Banana' },
  { id: 3, name: 'Cherry
Style-Based Conditions:
Inline Conditional Styling:
React:
-
styles can be applied conditionally using inline styles
import React from 'react';

const Home= () => {
  const isActive = true;

  const style = {
    color: isActive ? 'green' : 'red',
    fontWeight: isActive ? 'bold' : 'normal',
  };

  return <h1 style={style}>Welcome to our React Application</h1>;
};

export default Home;
Angular:
-
In angular call ngStyle
home.component.html
<h1 [ngStyle]="{'color': isActive ? 'green' : 'red', 'font-weight': isActive ? 'bold' : 'normal'}">
  Conditional Styling in Angular
</h1>
home.component.ts
isActive: boolean = true;
Explanation:
-
Directive: [ngStyle] binds an object of style properties to the element.
-
Dynamic Values: Styles change based on the value of isActive.
Conditional with Classes:
React:
import React from 'react';
import "./App.css"

const Home= () => {
  const isActive = false;

  return (
    <h1 className={isActive ? 'active' : 'inactive'}>
      Conditional Class Styling in React
    </h1>
  );
};

export default Home;
App.css
.active {
  color: green;
  font-weight: bold;
}

.inactive {
  color: red;
  font-weight: normal;
}
Angular:
home.component.html
<h1 [ngClass]="isActive ? 'active' : 'inactive'">
  Conditional Class Styling in Angular
</h1>
home.component.css
.active {
  color: green;
  font-weight: bold;
}

.inactive {
  color: red;
  font-weight: normal;
}
home.component.ts
isActive: boolean = false;
Explanation:
-
Directive: [ngClass] applies a class based on the condition.
-
Styling: CSS classes define the styles.
Service in Angular:
In this section, we will look at Angular services.
In React, data can be shared across multiple components using Context. Similarly, in Angular, data sharing is typically achieved using Services. Services in Angular act as a central point for managing and sharing data or logic across components.
Create Service:
ng generate service <Your file name>
(i.e) ng generate service my-service
my-service.service.ts:
import { Injectable } from '@angular/core';

@Injectable({
  providedIn: 'root',
})
export class MyServiceService {
  constructor() { }
}
Explain:
-
@Injectable(): Marks the class as a service that can be injected into other parts of your app.
-
providedIn: 'root': Automatically registers the service globally, so you don’t need to configure it manually.
my-service.service.ts
import { Injectable } from '@angular/core';

@Injectable({
  providedIn: 'root',
export class MyServiceService {
  constructor() { }
  getItems() {
    return ['c', 'c++', 'python'];
  }
}
Inject the Service into a Component:
-
Open the component where you want to use the service (e.g., home.component.ts).
-
Inject the service in the constructor:
import { Component } from '@angular/core';
import { MyServiceService } from './my-service.service';
@Component({
  selector: 'app-home',
  templateUrl: './home.component.html',
  styleUrl: './home.component.css'
})
export class AppComponent {
  items: string[] = [];

  constructor(private myService: MyServiceService) { }

  ngOnInit() {
    this.items = this.myService.getItems();
  }
}
Explain:
-
The component will use the MyServiceService to get a list of items when it is initialized.
-
The fetched items will be stored in the items property, which can then be used in the template (home.component.html) to display the items.
home.component.html:
<h1>Items:</h1>
<ul>
  <li *ngFor="let item of items">{{ item }}</li>
</ul>
Hooks:
In React, the method used to update values or manage state is through React hooks (such as useState, useEffect, etc.). In Angular, the equivalent method for managing component lifecycle events is through Angular lifecycle hooks.
So, you can say:
-
In React, we use React hooks to manage state and side effects.
-
In Angular, the equivalent functionality is handled by Angular lifecycle hooks (like ngOnInit, ngOnChanges, ngOnDestroy, etc.).
The key difference is that hooks in React are functions that handle state and side effects, while Angular lifecycle hooks are methods that are called at specific points in a component's lifecycle.
ngOnInit:
-
Once the component's inputs are set and before the view is rendered.
-
Ideal for initializing data or fetching external data from a service.
home.component.ts
import { Component, OnInit } from '@angular/core';

@Component({
	selector: 'app-home',
	templateUrl: './home.component.html',
	styleUrl: './home.component.css'
})
export class ExampleComponent implements OnInit {
  data: string;

  constructor() {}

  ngOnInit() {
    this.data = 'Data fetched during ngOnInit lifecycle hook';
    console.log('ngOnInit called');
  }
}
ngOnChanges:
-
Whenever an input property of the component changes (called before ngOnInit and whenever the input properties change).
-
Used when you want to track changes to input properties and perform actions when they change.
import { Component, OnChanges, SimpleChanges, Input } from '@angular/core';

@Component({
	selector: 'app-home',
	templateUrl: './home.component.html',
	styleUrl: './home.component.css'
})
export class ExampleComponent implements OnChanges {
  @Input() inputValue: string;

  ngOnChanges(changes: SimpleChanges) {
    console.log('ngOnChanges called', changes);
  }
}
ngOnDestroy:
-
Before the component is destroyed (i.e., when the component is removed from the DOM).
-
Used to perform cleanup tasks like unsubscribing from observables or detaching event listeners to avoid memory leaks.
import { Component, OnDestroy } from '@angular/core';

@Component({
	selector: 'app-home',
	templateUrl: './home.component.html',
	styleUrl: './home.component.css'
})
export class ExampleComponent implements OnDestroy {
  ngOnDestroy() {
    console.log('ngOnDestroy called');
  }
}